Adobe Photoshop Tutorials
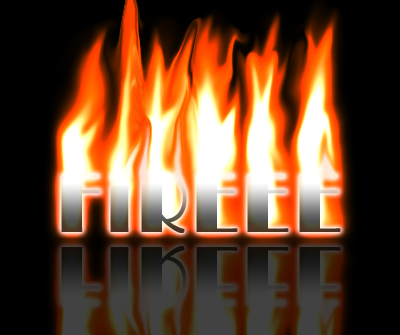
Fire Text with a Reflection
Maket this hot reflected fire text:
Step 1
Create a blank document of the desired size. Do not make it too small, you can crop it later on.
Dye the background black and type your text in white.

Create a new layer and dye it black.
Copy your text layer.
Merge (CTRL-E) your copied text layer and the new black layer.
Step 2
Rotate your image by 90 degree and apply the wind filter (Filter, Stylize, Wind) 3 or 4 times. Rotate the image back now.

Step 3
Use Gaussian Blur with a radius of about 7.
Then hit CTRL-U and pick this color:
Duplicate the layer and color the copy like this:

Your layer palette should look like this now:

Step 4
Set your top layer to color dodge and merge the two top layers.

Step 5
Hit CTRL-SHIFT-X to bring up the Liquify dialogue and start modeling the flames. Start with a big brush and reduce the size as you get into the detailed flame modeling.

Step 6
Move your original text layer to the top and apply these layer styles:
Outer Glow:

Gradient Overlay:
Step 7
Merge all the layers (CTRL-E)
On to the reflection:
Copy your one layer, choose Edit --> Transform --> Flip vertically.
Set the layer's blending mode to screen and position it properly beneath your fire text.
Lower it's opacity to someting like 10-30 percent and you're done with your fire text.