Adobe Photoshop Tutorials
Future Text
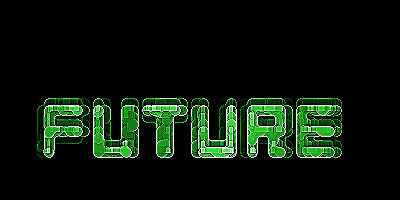
Learn how to create this Future Text Effect:
Step 1
Create a blank document, size depends on the size of your text.
Set the background color to black.
Add your text in white.

Step 2
Hold down CTRL and click the icon of your text layer, then use Filter --> Render --> Clouds.
Now use Filter --> Stylize --> Extrude and apply settings like these:

It will look like this now:
Press CTRL-E to merge down the layers.
Step 3
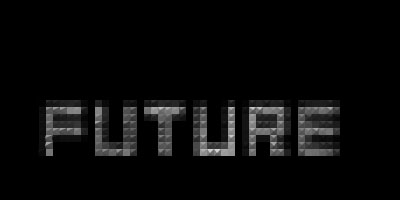
The next filter you are going to apply is Paint Daubs ( Filter --> Artistic --> Paint Daubs)
These are the settings used in the example:

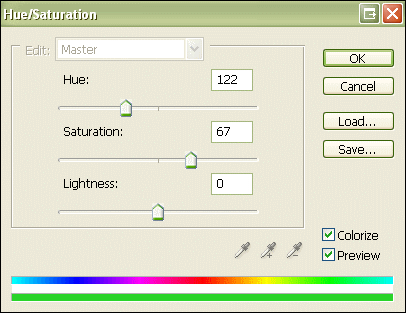
Step 4
All that's left to do is picking a nice color (CTRL-U), the color I used for this example is this:
.. and there's your future text: